





Zombie Dying: Survival Days
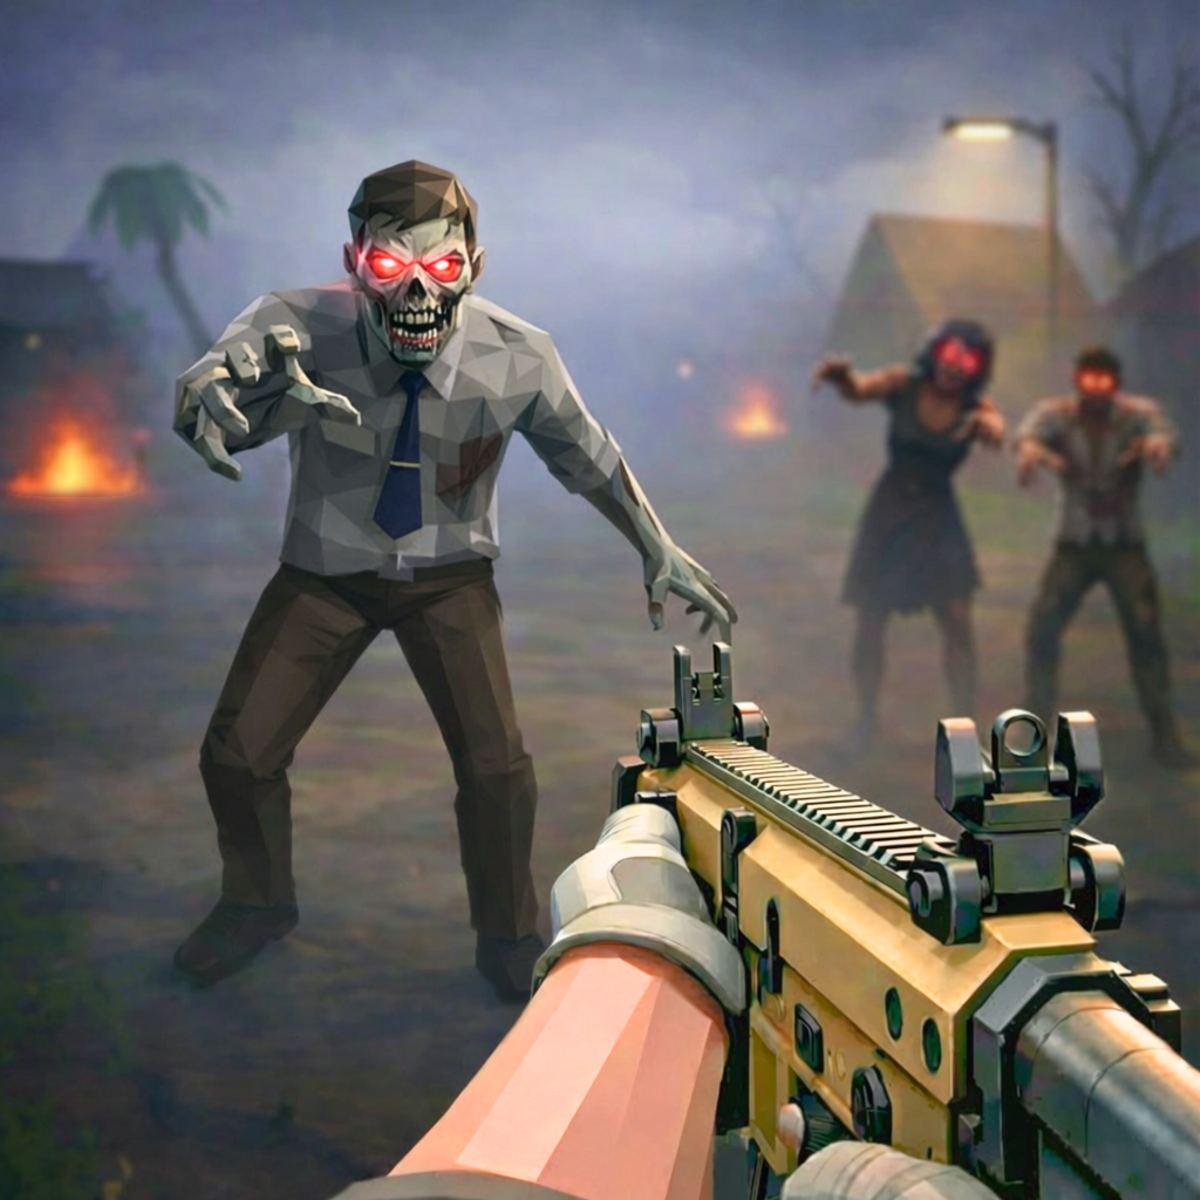
The zombie apocalypse has been done to death—pun intended—in games. You’ve seen the endless wave shooters, the crafting survival sims, the walking simulators with a few shamblers thrown in. But every so often, a browser title comes along that reminds you why the genre still works. Zombie Dying: Survival Days is that kind of game. It’s not trying to be the next Left 4 Dead or Days Gone. It’s a straightforward, no-nonsense third-person shooter where you play as one of four survivors trapped in a city crawling with the undead. Each in-game day throws a new mission at you—rescue a civilian, survive a horde, or just kill as many zombies as possible before time runs out. You earn cash from every completed job, and that cash buys better guns, stat upgrades, and new characters. Simple, right? But simple doesn’t mean shallow.
What keeps people coming back is the loop: short, punchy missions that take two to five minutes, followed by a quick trip to the shop to make your character a little stronger. It’s not complicated. It doesn’t try to be. The game knows exactly what it is—a fast, satisfying shooter you can play in a browser without any downloads or sign-ups. Developer Art Industries has built a solid little time-sink here, and with over 42,000 votes on Poki and a 4.3 rating, it’s clear a lot of players agree. I’ve sunk more hours into this than I’d like to admit, and I keep coming back because the core loop is just that good.
How to Play
The objective is simple: survive 300 days in a zombie-infested city. Each day presents a different mission, and your goal is to complete that mission to earn money. Fail, and you get nothing—but you can retry as many times as you want. There’s no permadeath or harsh punishment, so the game encourages experimentation. You can try a risky strategy, die horribly, and jump right back in without losing progress. That freedom makes the game feel less stressful than a lot of survival shooters. You’re not punished for learning.
Desktop controls: Move your character using the A and D keys (or the Left and Right arrow keys). Aim with the mouse, and fire with the Spacebar. You can switch between up to four weapons using the number keys 1, 2, 3, and 4. That’s it. The controls are tight and responsive, which is crucial for a shooter that relies on quick reactions. I’ve played dozens of browser shooters where the controls feel floaty or laggy, and this one is refreshingly snappy. The spacebar for shooting might take a minute to get used to if you’re coming from a mouse-click shooter, but it actually works well because it frees your mouse hand for precise aiming. You can also rebind keys in the settings if spacebar isn’t your thing.
Mobile controls: On phones and tablets, the game switches to virtual buttons. A joystick on the left side of the screen handles movement, while a fire button on the right lets you shoot. Weapon switching is done via icons at the bottom. The mobile version works fine, but the smaller screen can make aiming a little trickier during dense horde fights. I’d recommend playing on desktop if you have the option. On a phone, you’ll find yourself accidentally tapping the wrong weapon icon in the heat of a swarm, which can be frustrating. Still, for quick sessions on the bus, it’s perfectly playable. Just don’t expect to set any high scores on mobile.
Your character automatically faces the direction you’re moving, so you don’t have to worry about manual aiming in the traditional sense. It’s more like a run-and-gun where positioning matters more than pixel-perfect accuracy. You’ll want to keep moving constantly—standing still in a zombie game is a death sentence. The auto-aim is generous, but it doesn’t do the work for you. You still need to line up shots and manage your distance. If you’re too close, you’ll get swarmed. Too far, and your shots might miss or do less damage. Finding that sweet spot is key.
Game Modes and Features
Zombie Dying: Survival Days doesn’t have separate game modes in the traditional sense. Instead, the progression is built around the 300-day structure. Each day is a mission, and missions fall into a few recurring types. The variety keeps things from getting stale, though the core gameplay loop doesn’t change much. You move, you shoot, you loot. But the mission types do force you to adapt your strategy.
- Rescue missions: You need to reach a civilian surrounded by zombies and escort them to a safe zone. The civilian has their own health bar, so you can’t just blast everything and hope for the best. If the civilian dies, you fail the mission. This means you have to be more careful with your positioning. You can’t just run in guns blazing. I’ve had missions where I cleared a path, only to have a zombie spawn behind the civilian and take them down in two hits. The escort AI is decent—they follow you reasonably well—but they don’t dodge or fight back. You have to babysit them. These missions pay well, so they’re worth the hassle.
- Survival missions: A timer counts down while waves of zombies pour in. Kill as many as you can before time expires. These are great for grinding cash because the kill count directly affects your payout. The waves get progressively harder, with more runners and tanks appearing as the timer ticks down. I like to use these missions to test new weapons or upgrades. If you’re low on cash, replaying a survival mission a few times can net you a nice chunk of change. Just be prepared to move constantly—the zombies spawn from all sides, and if you get cornered, you’re done.
- Boss fights: Every so often, a tougher zombie appears—bigger, slower, but with much more health and damage. These require you to use your best weapons and keep your distance. Bosses have unique attack patterns. Some charge at you, some vomit acid, some summon regular zombies to distract you. The first time I encountered the acid-spitter, I got caught in the splash and lost half my health before I even realized what was happening. Boss fights are the only missions where I recommend standing still for a moment to line up headshots. But even then, you need to keep moving to avoid their attacks. These missions also drop bonus cash and sometimes rare weapon parts.
Weapons and upgrades: There are over 15 weapons to unlock, ranging from pistols and shotguns to rifles and even a minigun. Each weapon can be upgraded multiple times using cash, which increases damage, fire rate, and reload speed. You can carry up to four weapons at once, so choosing a balanced loadout is key. I usually go with a shotgun for close encounters, a rifle for mid-range, and a fast-firing pistol for clearing stragglers. The fourth slot is flexible—sometimes I bring a sniper for long-range picks, sometimes a submachine gun for horde clearing. The minigun is fun but eats ammo fast, so I only use it on survival missions.
Weapon upgrades aren’t linear. Each level costs more than the last, and the stat boosts get smaller as you go higher. A level 1 to level 2 upgrade might double your damage, but level 4 to level 5 might only add 10%. That means you need to decide whether to spread your cash across multiple weapons or focus on one. I tend to focus on one primary weapon (usually the assault rifle) and keep a backup shotgun for emergencies. That approach has served me well through the first 200 days.
Characters: Four unique survivors are available. Each has slightly different starting stats—health, speed, and damage. The first character is free, and the others cost increasing amounts of money. Unlocking them is a good long-term goal, but the stat differences aren’t huge. Play whoever looks cool to you. The second character, a woman in a hoodie, has slightly higher speed, which I find helpful for kiting. The third character has more health but slower movement. The fourth is a balanced all-rounder. I unlocked all four just to try them out, but I ended up sticking with the first one because I liked her default weapon. The stat differences are noticeable early on, but once you upgrade your stats with cash, they matter less. So don’t stress about which character to pick.
Achievements: The game includes a set of achievement-style challenges that award bonus cash. Things like “kill 1,000 zombies” or “complete 50 missions without dying.” They’re a nice way to earn extra money without grinding, and they give you something to aim for beyond just surviving the 300 days. Some achievements are easy—like “complete your first mission”—while others take real dedication, like “kill 10,000 zombies.” I’m still working on that one. The cash rewards from achievements can double your income in the early game, so check the list often. You can access it from the main menu. It’s worth targeting the ones that align with your playstyle. If you’re a shotgun user, go for the shotgun kill achievements. If you prefer pistols, there’s an achievement for that too.
Tips and Strategies
After spending a fair number of hours with this game, here’s what actually works. These aren’t theoretical tips—they’re things I learned the hard way after dying repeatedly.
Always keep moving. Zombies in this game are faster than they look, and they swarm from multiple directions. If you stand still to aim, you’ll get surrounded. Use the environment—there are barrels, cars, and walls you can circle around to break line of sight. Kiting is your best friend. Lead the horde in a circle, picking off the front runners, then double back to clear the stragglers. I’ve found that moving in a figure-eight pattern around two obstacles works wonders. It keeps the zombies from clustering too tightly and gives you breathing room.
Prioritize weapon upgrades over new guns. It’s tempting to buy every shiny new weapon as soon as it unlocks, but upgrading a weapon you’re comfortable with is usually more effective. A fully upgraded pistol can outperform a stock shotgun in many situations. I’d recommend upgrading your primary weapon to at least level 3 before spending money on a new character. That said, don’t ignore the shotgun entirely. When you’re surrounded, a level 1 shotgun is still better than a level 5 pistol. The key is balance. Upgrade your main weapon first, then your close-range backup, then your long-range option.
Save your best weapons for boss fights. Regular missions can be handled with the basic pistol or a rifle. When you see a boss icon on the mission selection screen, equip your highest-damage weapons. Bosses have a lot of health, and running out of ammo mid-fight is a real problem. I once went into a boss fight with only a pistol and a half-empty rifle, and I had to run around for two minutes waiting for ammo drops. It was not fun. Always stock up on ammo before a boss mission. You can buy ammo packs from the shop, but they’re expensive. Better to conserve ammo during regular missions so you have a full stock for the boss.
Use the environment to funnel zombies. In many missions, there are narrow alleys or doorways. Standing at one end and firing into the crowd as they pile through is extremely efficient. Just watch your back—zombies can spawn behind you. I’ve been caught off guard more times than I can count by a zombie that spawned right behind me while I was focused on the funnel. The game has a nasty habit of spawning enemies in blind spots. So when you’re funneling, keep checking your minimap (if you have one) or just turn around every few seconds. Also, be aware that some zombies can climb over obstacles. The runners in particular can vault low walls, so don’t assume a fence will hold them.
Don’t ignore the achievements. Early on, the cash rewards from achievements can double your income. Check the achievement list and target the easy ones first. Killing 500 zombies with a pistol, for example, is something you’ll do naturally, but the bonus cash helps a lot in the first 50 days. I made the mistake of ignoring achievements until day 100, and I regretted it. I could have had a much easier time if I’d cashed in those rewards earlier. Some achievements also unlock cosmetic items, which don’t affect gameplay but are fun to show off.
Learn the enemy types. Regular zombies are slow but numerous. There are also faster “runner” zombies that charge at you, and “tank” zombies that take extra damage. Prioritize runners first—they close distance quickly and can corner you. Tanks can be kited. There’s also a spitter zombie that shoots a glob of acid. It does damage over time and slows you down. If you see a spitter, take it out immediately. The acid pool stays on the ground for a few seconds, so don’t walk through it. I’ve died more times to acid than to tanks. Also, watch out for exploding zombies. They glow green and detonate when they get close. They don’t have much health, but if you kill them at close range, the explosion still hurts you. Best to shoot them from a distance.
Common Mistakes
New players tend to fall into a few traps. Here are the ones to avoid, based on my own painful experiences.
Spending all your money before a boss fight. It’s easy to burn cash on upgrades right after a mission, but if the next day is a boss fight and you have no ammo or health packs, you’re in trouble. Always keep a reserve of at least 500 coins for emergency purchases. Health packs cost 100 each, and ammo packs cost 150. If you go into a boss fight with low health and no ammo, you’re basically throwing the mission. I learned this the hard way when I spent all my cash on a weapon upgrade, then faced a boss with only 20 bullets. I had to run around picking up ammo drops while the boss chased me. It took forever and I almost died.
Using the same weapon for everything. Each weapon has a specific range and fire rate. Trying to use a shotgun at long range is a waste, and a pistol up close against a horde will get you killed. Switch weapons based on the situation. The number keys make this fast—use them. I see a lot of new players stick with the default pistol the whole game, and they struggle. The pistol is fine for early missions, but by day 50, you need to be switching to a rifle or shotgun for heavy encounters. Don’t be afraid to experiment. The game gives you plenty of opportunities to try different loadouts.
Ignoring movement controls on mobile. On phones, it’s tempting to just tap the fire button and stand still. That’s a sure way to die. The mobile joystick is responsive; use it to strafe and dodge. Practice moving and shooting at the same time. It takes a bit of coordination, but it’s doable. I recommend starting with easier missions on mobile to get the hang of it. Also, the mobile version has an auto-aim option in the settings. Turn it on if you’re struggling. It’s not perfect, but it helps.
Not upgrading health. Many players focus entirely on damage, but your character’s health determines how many mistakes you can survive. Upgrade health to at least level 5 before the 100-day mark. You’ll thank me later. I neglected health until day 80, and I kept dying to random hits. Once I put some points into health, the game became much more forgiving. A good rule of thumb is to spend one point on health for every two points on damage. That keeps you balanced.
Rushing through missions. Some missions have hidden caches of cash or ammo. Take a moment to explore the map before the timer runs out. You might find extra supplies that make the next day easier. I’ve found hidden rooms behind breakable walls, and supply crates in corners that aren’t on the main path. The game doesn’t mark them, so you have to look for them. If you see a wall that looks cracked, shoot it. Sometimes there’s a cache behind it. Also, check behind large objects like trucks and dumpsters. The extra ammo can be a lifesaver.
FAQ
Is Zombie Dying: Survival Days free to play?
Yes, it’s completely free in your browser on Poki. No downloads, no hidden paywalls. The only thing you can spend is time. There are no ads that interrupt gameplay—just the occasional banner ad on the page. It’s a refreshingly honest monetization model.
Can I play on my phone?
Absolutely. The game works on both desktop and mobile devices. The controls adapt automatically, though I find desktop easier for precise aiming. The mobile version saves your progress separately, so you can switch between devices, but you can’t carry progress over. That’s a minor annoyance, but not a dealbreaker.
How long does it take to beat the game?
Surviving all 300 days can take anywhere from 10 to 20 hours, depending on how quickly you upgrade and how often you fail missions. It’s not a short game for a browser title. I’d say 15 hours is a realistic average. Some missions are harder than others, and you might get stuck on a boss for a while. But the game respects your time—missions are short, so you can make progress in small bursts.
Do I need to create an account?
No account required. Your progress is saved automatically in your browser’s local storage. Just don’t clear your cookies, or you’ll lose everything. I lost my first save that way. If you play on multiple devices, you’ll have separate saves. There’s no cloud sync, so pick one device and stick with it.
What happens after day 300?
The game ends with a victory screen and a score tally. There’s no New Game Plus or endless mode, but you can always start a new save and try a different character or challenge yourself to complete it faster. Some players try to beat the game without dying or with only the starting pistol. There’s a small community of speedrunners on YouTube who compete for the fastest 300-day clear. It’s not a huge scene, but it exists.
Closing
Zombie Dying: Survival Days doesn’t reinvent the wheel. It’s a solid, no-frills zombie shooter that respects your time and doesn’t ask for anything in return. The loop is addictive, the controls are tight, and the progression gives you a reason to keep playing through all 300 days. If you’ve got ten minutes to kill and a hankering for some undead headshots, this one’s worth a click. It’s not going to win any awards for innovation, but it doesn’t need to. Sometimes you just want a game that works, that’s fun, and that you can play in a browser without any hassle. Zombie Dying: Survival Days delivers exactly that. Give it a try—you might find yourself saying “just one more day” for longer than you expected.